How to reset Liftmaster keypad are a necessary part of any complex automation system. However, like all electronic devices, they can go wrong from time to time.
In this blog post, we will show you how to reset a liftmaster keypad so that you can get your system back up and running as quickly as possible.
Contents
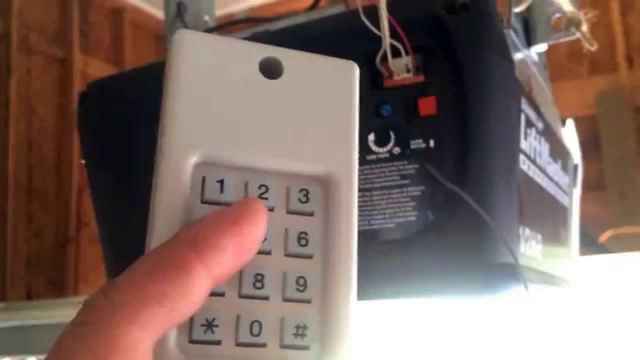
How To Reset Liftmaster Keypad Without Code Unknow Pin:
If your LiftMaster keypad is not working, there are a few things you can do to try and fix the issue. The first thing to check is if the power is turned on to the unit.
If it’s not, then you’ll need to reset the unit by following these steps:
1. Disconnect all power sources from the LiftMaster keypad, including the AC cord and any batteries that might be attached.
2. Open the cover on the back of the keypad (it has a hinge) and remove all of the screws.
3. Slide out both sides of the keypad cover and set it aside.
4. On one side of the keyPad there is a small circuit board with two connectors on it. Make sure that these connectors are facing down so that you can connect them later when you’re resetting the unit.
5. On the other side of the board there are three rubber buttons (red, green, and yellow). Push each button in turn 10 times slowly to reset it.
6. Reattach both sides of the cover and screw it back in place using new screws.
7. reconnect all power sources to the LiftMaster keypad and test it out to see if it works properly now!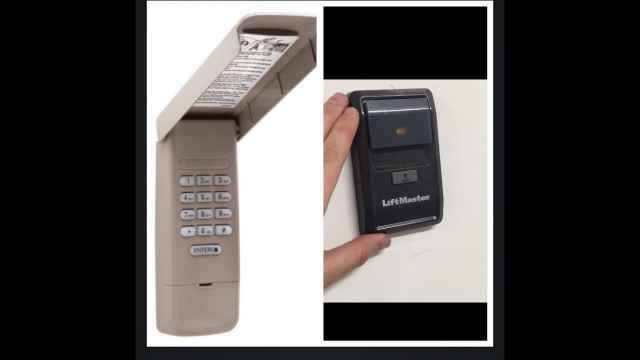
How To Reset A Liftmaster Garage Door Opener
To reset a liftmaster garage door opener, you’ll need the following:
-A Phillips head screwdriver
-A bolt cutters
-A T10 Torx screwdriver
-An Allen wrench
1. Open the garage door by pressing and holding down the “Up” button on the keypad.
2. Insert the Phillips head screwdriver into one of the screws on the side of the opener.
3. Turn the screwdriver until it comes out, then do the same with the other screw.
4. Cut off both screws with the bolt cutters, being careful not to lose them.
5. Remove both pieces of plastic housing from around the opener mechanism with the T10 Torx screwdriver.
6. Push all of the wires up through their respective holes in order to free them from any hardware or tape that may be attached to them (see photo).
7. Replace both pieces of housing and reattach with screws and washers (see photo). Do not over-tighten!
Tips For Safe And Effective Resetting
There are a few tips for resetting your liftmaster keypad that can make your life easier.
1. Always unplug the keypad from the outlet before resetting it. This will prevent any accidental programming or damage to the keypad.
2. To reset the keypad, hold down both buttons at the same time until the green light flashes three times and then releases both buttons.
3. To clear any pending entries, press and hold down both buttons until the green light flashes twice and then releases both buttons.
How LiftMaster Keypads Work:
If your LiftMaster keypad is not responding to pushes, you may need to reset it. To reset the keypad, follow these steps:
1. Remove the four screws that hold the top cover in place.
2. Lift the top cover off of the keypad.
3. Hold down each pushbutton for two seconds until they light up green and release them. The LEDs will stay green for about ten seconds after each button has been released, so don’t worry if they all light up at once.
4. Replace the top cover and screws and reattach it to the keypad.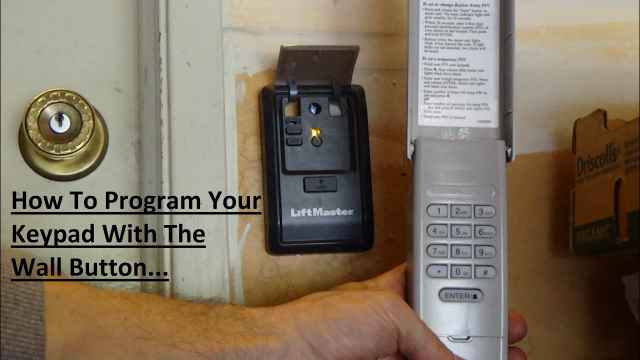
What to Do if Your Keypad Doesn’t Respond After a Reset
If your liftmaster keypad doesn’t respond after a reset, there are a few things you can do. First, try pressing the reset button on the keypad.
If that doesn’t work, you can try pressing and holding down the up and down arrows until the keypad powers on. Finally, if all of those methods fail, you can try to access the programming code on the keypad by entering 999 into the command prompt.
Conclusion
If your Liftmaster keypad isn’t working right, there are a few things you can do to try and fix the problem. First, check to see if you have any dead batteries in the keypad. If so, replace them.
Second, reset the lock by pressing and holding both the on/off switch and the entry code button at the same time for three seconds. Finally, test whether or not the keypad is working by entering your code into the keypad.