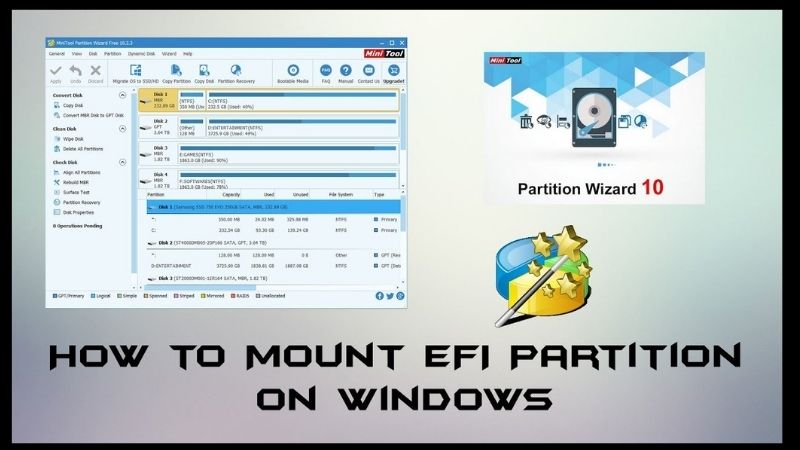
The purpose of this tutorial is to show you, How to Mount and Modify MacOS EFI Partition on Windows 10- Hackintosh. This content is useful.
If you have created your own macOS bootable USB key for your Hackintosh (or purchased it from our store ), and you need to change the EFI partition of the key but you don’t have a Mac available, you have come to the right place.
Note: In this tutorial, we are talking about the bootable USB stick, but if you need to change the EFI partition of a Hackintosh SSD or hard drive where macOS is installed, the steps will be exactly the same.
Whether you need to modify the config.plist file, add text, or even change the theme, you will need to have access to the EFI partition of the bootable key. On macOS, it’s pretty simple (with Clover Configurator for example), but on Windows, you’ll have to tinker a bit. Don’t panic, by following this tutorial, and in less than 5 minutes, you will get there!
Contents
Mount And Modify MacOS EFI Partition On Windows 10- Hoshackint
Prerequisites
- A Windows computer
- Your bootable USB key
- Minitool Partition Wizard software
- Q-Dir software
Mounting The EFI Partition
Before accessing the EFI partition on Windows, you will have to mount it (understand that when your key is plugged in, the partition is hidden, you will have to make it appear). There are several ways to mount a partition, here is a fairly simple method.
Download and install the Minitool Partition Wizard software mentioned earlier. Then run it as administrator (very important, otherwise we will not be able to access the partition).
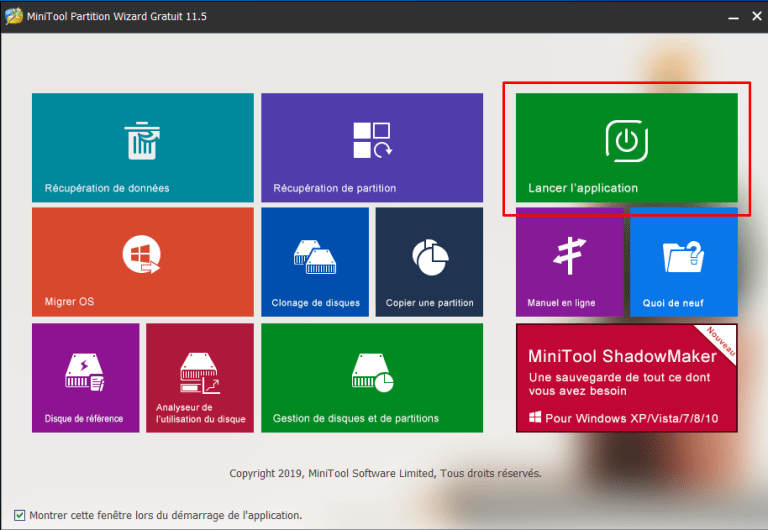
Then click on the “Launch application” icon. You will arrive at a new interface. In the bottom menu which contains your disks, locate your USB key as well as its EFI partition.

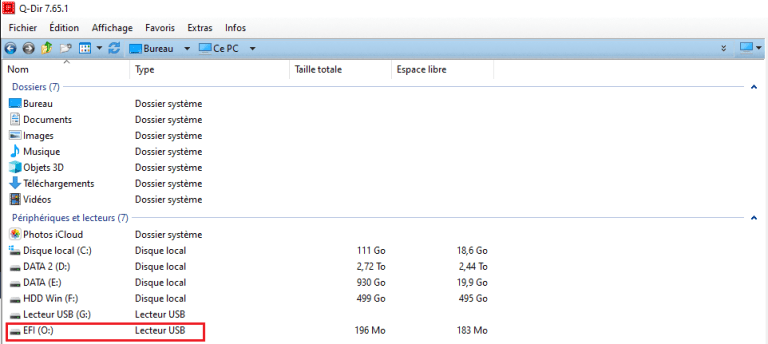
Right-click on it, then click on the “Change Letter” option. You will be able to assign it a letter, choose the one you want. In my case, I chose the letter (O :).
There you have it, the partition is now mounted, but it is impossible to access it via Windows file explorer, you will have to use another application.
Access To The EFI partition
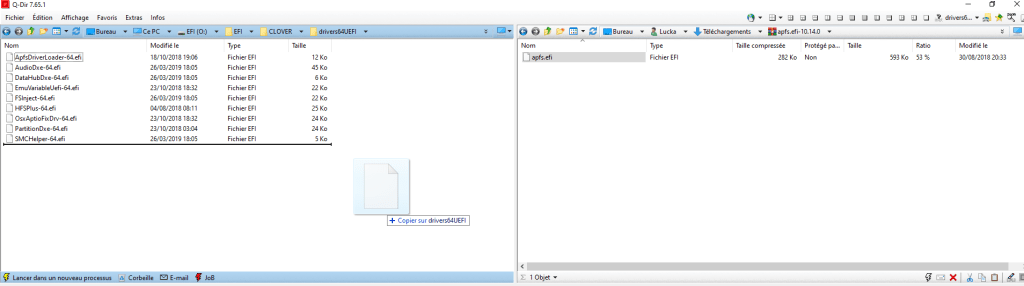
To access the EFI partition of our key, we will use the Q-Dir software mentioned in the prerequisites. Download it, install it and open it as administrator (still for the same reasons, you know the song).
In the 4 menus/tabs of Q-Dir, you will have access to a separate file explorer to access the different folders on your computer. Choose the menu on the left for example and click on the EFI partition of your key that we have just mounted.
You can now browse the key and edit files, and even add and remove files. If you want to add a file, select it in one of the software’s other exploration tabs, and simply drag it into your score.
And there you have it, you can now manage everything from the Mount and Modify MacOS EFI Partition on Windows of your Hackintosh USB key directly on Windows.  If you have any questions or if the tutorial has helped you, please leave me a comment!